Introduction
Below are included instructions for setting up a shared folder and for connecting your DeNovix instrument to the shared folder through the network.
The sections below contain steps for different types of setups. Please refer to the appropriate section applicable to your IT situation.
- Configure a Windows PC for SMB Data Transfer
- Configure a Mac for SMB Data Transfer
- Configure a Linux PC for SMB Data Transfer
- Set up SMB Data Transfer on your DeNovix instrument
- Android OS
- Linux OS
A. Configuring a Windows PC for SMB Data Transfer
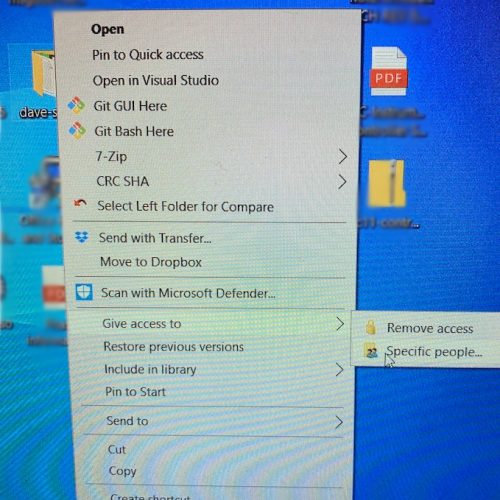
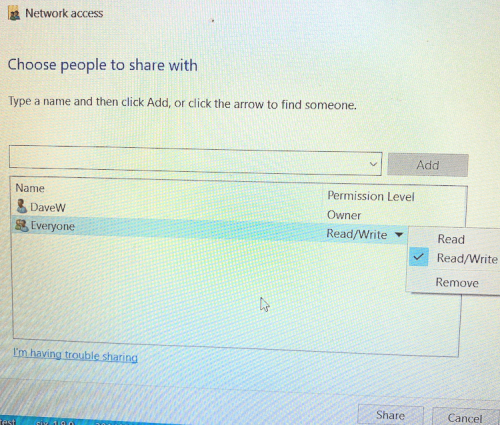
1. Turn on SMB Sharing
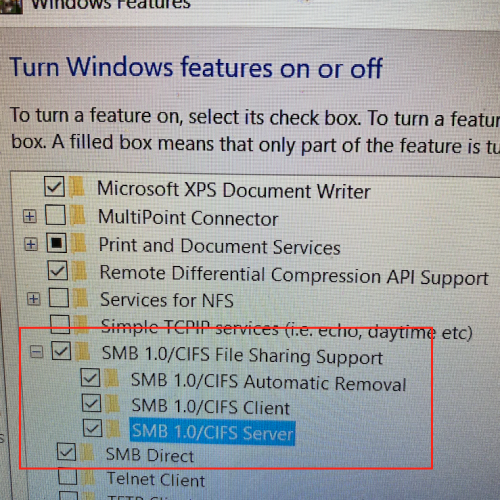
In the Search bar, look for “Turn Windows features on or off.” Find SMB 1.0 File sharing support and SMB Direct. If your DeNovix instrument has an Android OS, check the SMB 1.0 boxes and the SMB Direct box. If your instrument has a Linux OS, it is not necessary to turn on SMB 1.0. In this case, only check the SMB Direct box.
While configuring the Windows PC, you may need to reboot the instrument to enable certain settings.
13. Required Network Information
Make sure the instrument is connected to the same network as the Windows PC. Connections can be by WiFi or ethernet.
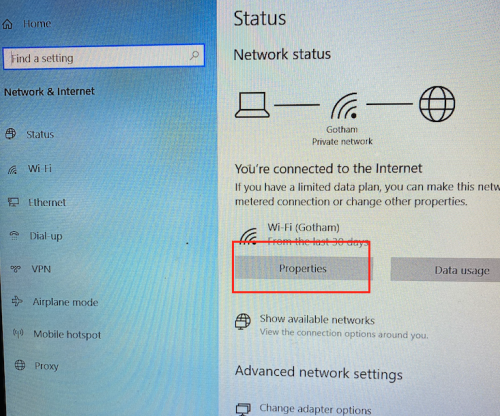
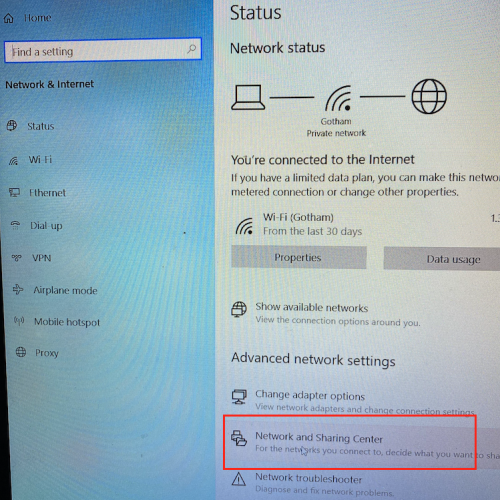
- Identify the IP address of the Windows PC. This is found in Network status under “Properties”. Another option is to use the command prompt and enter ipconfig
- The wireless IP address is reported in the “Wireless LAN adapter Wi-Fi” section.
- Identify the domain name the Windows computer is using.
- From the command prompt, type echo %userdomain%
- Identify the user name the Windows PC is using.
- From the command prompt, type echo %username%
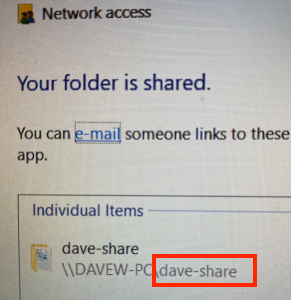
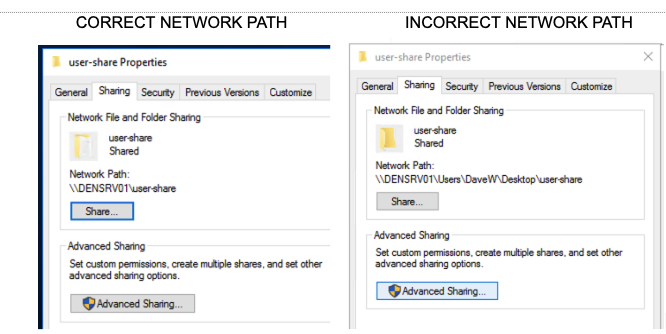
- Identify the share name the shared folder (user-share in example below). This is used for the “path” field. The share name (path) should always be in only lower case.
- Right click on shared folder and view properties to see the share name and that the network path is proper for an SMB share.
B. Configuring a Mac for SMB data transfer
Note: SMB data transfer for Mac is only compatible with Linux OS DeNovix instruments (see below).
- Create a folder in a location of your choice
- Open System Preferences on your Apple computer and select Sharing
- Add the folder you created by clicking the plus button underneath the “Shared Folders” field.
- Select that folder and then click “Options…” Here you will be able to select the users that have access to this folder by checking the box next to their name. Each user selected will require their password to be entered to allow access.
Note: If you are trying to add the same username as the MacBook/iMac that you are using but you are not sure of the username, open the Terminal (Finder > Applications > Terminal) and type whoami into the window and press enter. This will show you the username of your device.
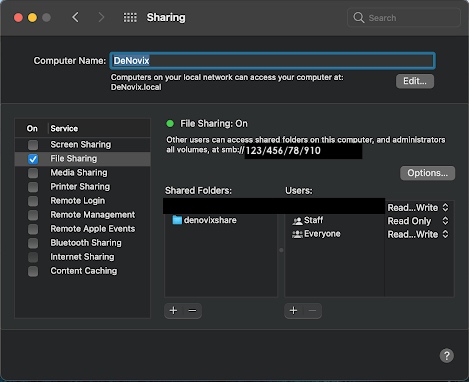
- The Sharing screen (see image) provides the information required to set up SMB-sharing on a DeNovix instrument
-
- Computer Name at the top of the screen should be added to the “Domain” field on the network folder set-up on your DeNovix device. Note: Do NOT add the .local.
- Directly underneath “File Sharing: On” you will find the computer’s local IP address preceded by smb:// This should be entered in the “Server” field of the network folder set-up on your DeNovix device. Note: Do NOT use the smb:// in front of the IP address.
C. Configuring a Linux PC for SMB data transfer
- Ensure that your Linux PC has the appropriate Samba packages installed and is connected to a network before proceeding with the rest of this walkthrough.
- The “Server” field on the network folder set-up needs your device’s local IP address. To find this, type ifconfig in the Terminal and use the IP address under the heading BROADCAST. Note: Generally local IP addresses will start with 192.168… so look for that address in the resulting information.
- The “Domain” field needs the device’s hostname. This can be found by entering the command hostname into the Terminal. Enter the resulting hostname into the Domain field on the DeNovix device.
- The “Path” field needs the Share Name from the device. This can be found by navigating to /etc/samba/smb.conf Open the smb.conf file and scroll down to the bottom of the document where you will find path=…… where the exact path to your folder will be located. Right above that in brackets […] you will find the Share Name.
- Enter the username and passwords in their respective fields and press connect.
- After seeing a “Pass” result, select “Send Test File” to ensure that the devices are able to communicate with one another.
D. Setting up your DeNovix Instrument
Determine the Operating System of your DeNovix Instrument
Follow the instructions in the appropriate section below.
- Linux OS: All CellDrop instruments and DS-11 / QFX / DS-C shipped since March 2021
- Android OS: DS-11/QFX/DS-C prior to March 2021
I. DeNovix Android Operating System Configuration
From the Accounts app, select General Account or a different user account. You must select the User when you open a measurement app. “General Account” is the default and used for this example.
Click the drop down in the right pane to switch from “App Default Settings” to “Management Network Folders”.
Click the three dot bar and choose “Add”.
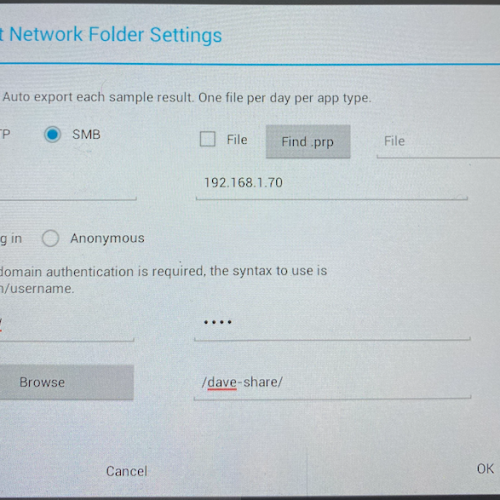
Enter the following settings. Refer to the Preparation Needed for Network Connection for hints on finding the IP address, Server Hostname and Username required.
- Choose the SMB radio button
- Provide a name for the folder. This can be anything the user chooses.
- In the “Server Hostname” field, enter the IP address of the host PC
- In the “Username”, enter the Username.
- Enter the password used to log in to the PC
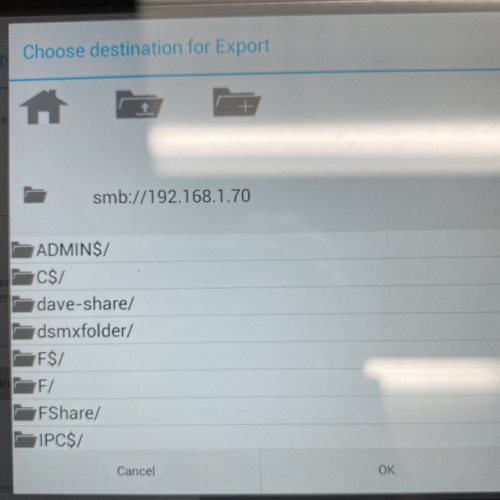
- The Path will be filled in automatically by following these steps
- Click the “Browse” button
- Locate the shared folder (“dave-share” in this example) and click it
-
- Click ok to select the folder
- Click OK to save the network folder settings
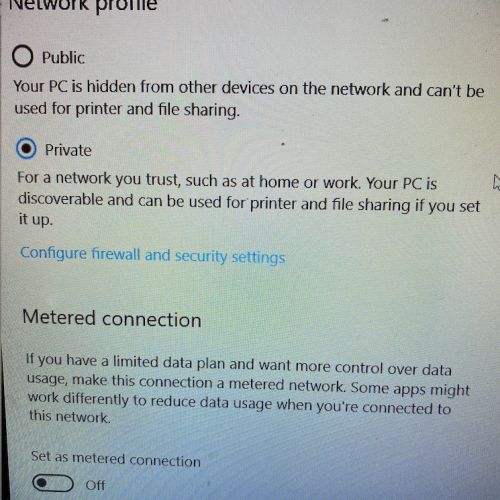
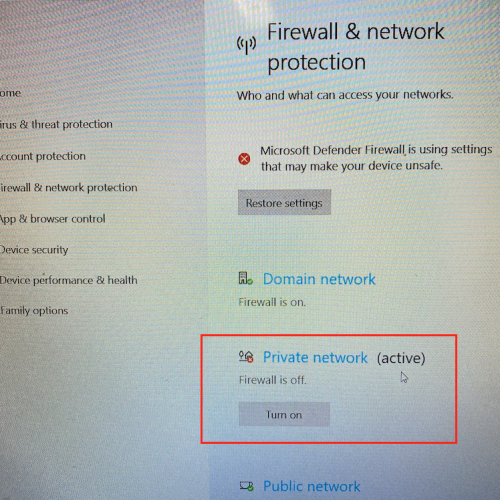
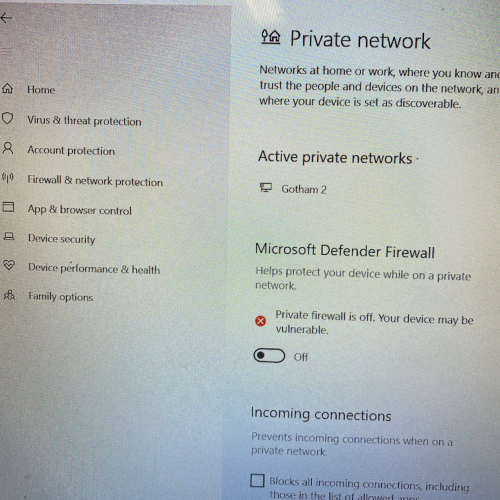
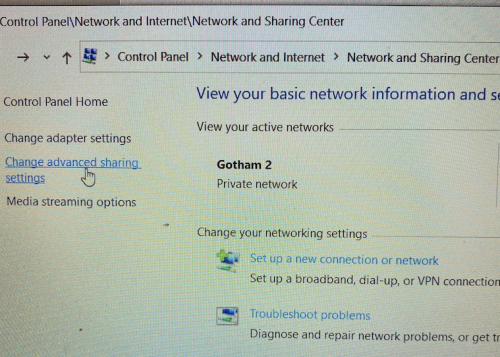
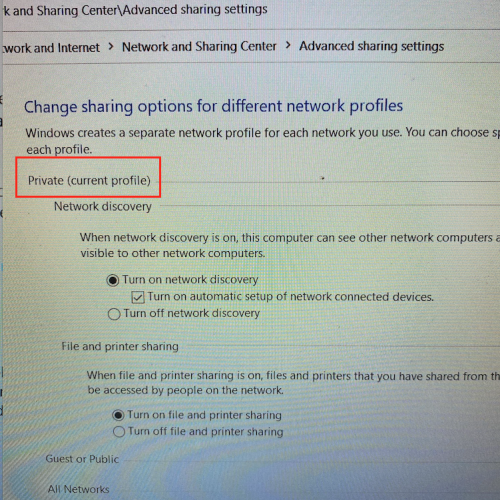
If the connection reports “fail”, carefully review the Windows network, sharing and firewall settings.
- Test Exporting
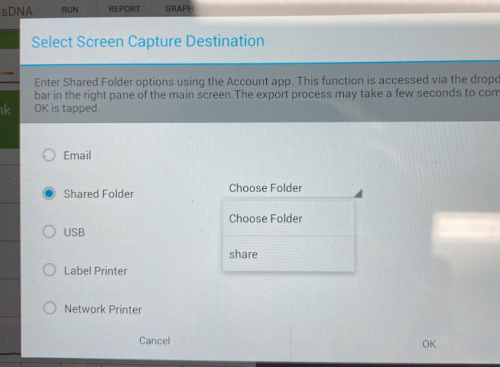
From a measurement app overflow menu (3 squares, top right of screen), select “Screen Capture” Choose “Shared Folder” and select the saved network folder that has been configured.
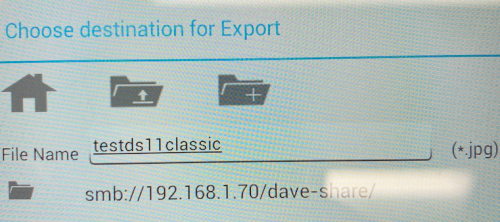
Enter a file name and press OK to save the file. Check the Windows PC to verify that the sharing was successful.
II. DeNovix Linux OS Folder Configuration
Open the Settings App and select “Network Folders” from the list on the left.
Touch the + icon to open the configuration screen
Enter the following settings.
- Name: User created name, can be anything.
- Server: Enter the IP address of the host PC
- Domain: Enter the Domain name
- Path: Enter shared folder share name
- Username: Enter the Username
- Password: login password for the user on the destination computer
- Touch “Connect” to connect to the network folder.
Touching “Send Test File” will save a text file in the network folder with time/date stamped information.
If the connection reports “fail”, carefully review the Windows network, sharing and firewall settings.
10-MAY-2023


