
Sample Preparation
Cells should be trypsinized to completion to minimize clumps. Ensure that a sample is homogeneous by vortexing or mixing immediately prior to loading. CellDrop EasyApps™ software contains sophisticated algorithms to identify individual cells within clumps. However, taking care to correctly prepare cells prior to loading will ensure that results are representative of the stock sample.
Sample Loading
- Open the desired Count app and select a protocol.
- Lower the arm. CellDrop requires the arm to be in the down position while loading.
- Clean the sample surfaces if there is visible debris in the preview image. See “Cleaning Sample Surfaces” below.
- Load pipette with the sample volume indicated on the Count button. Always use a fresh pipette tip.
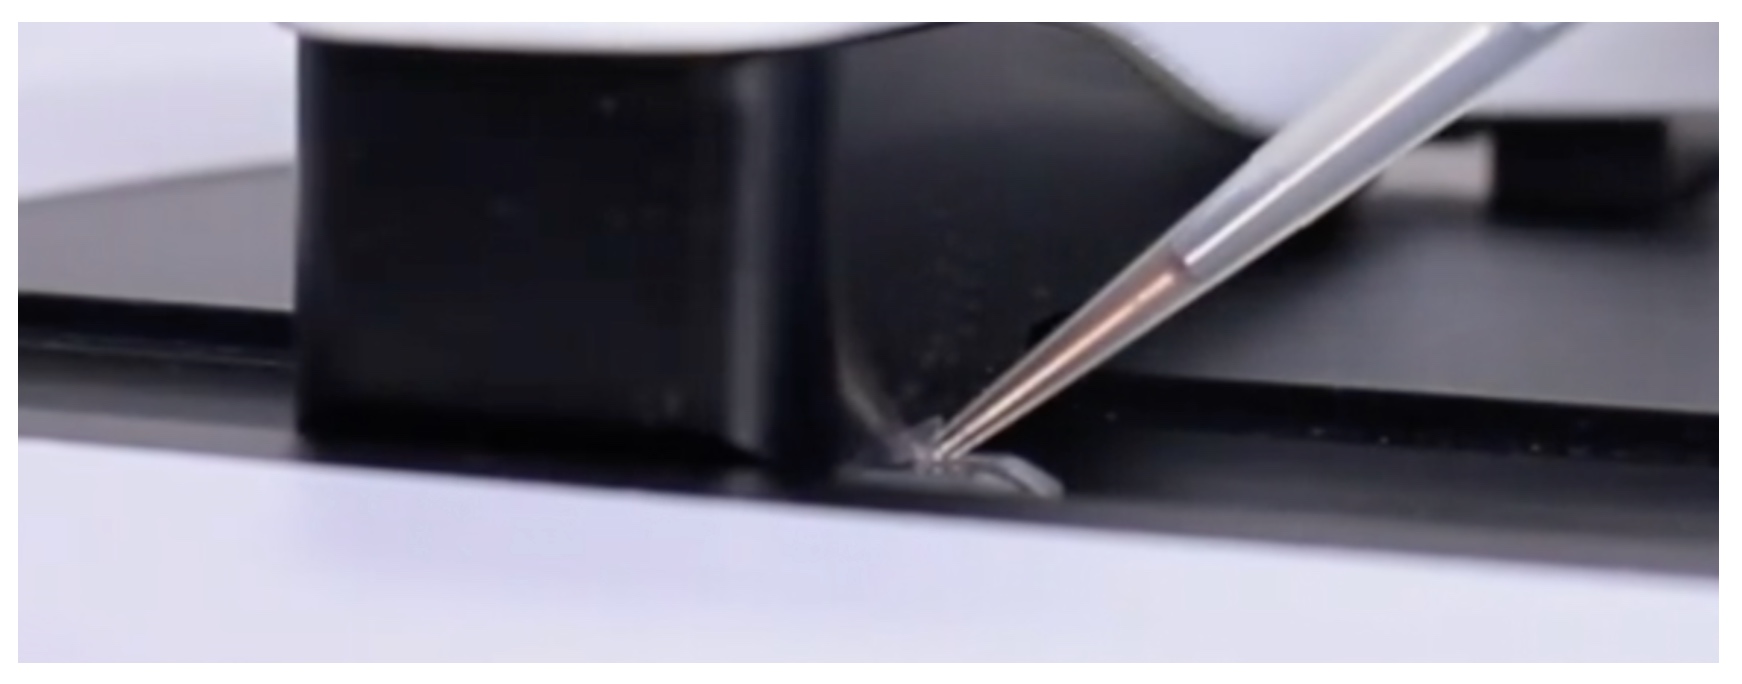
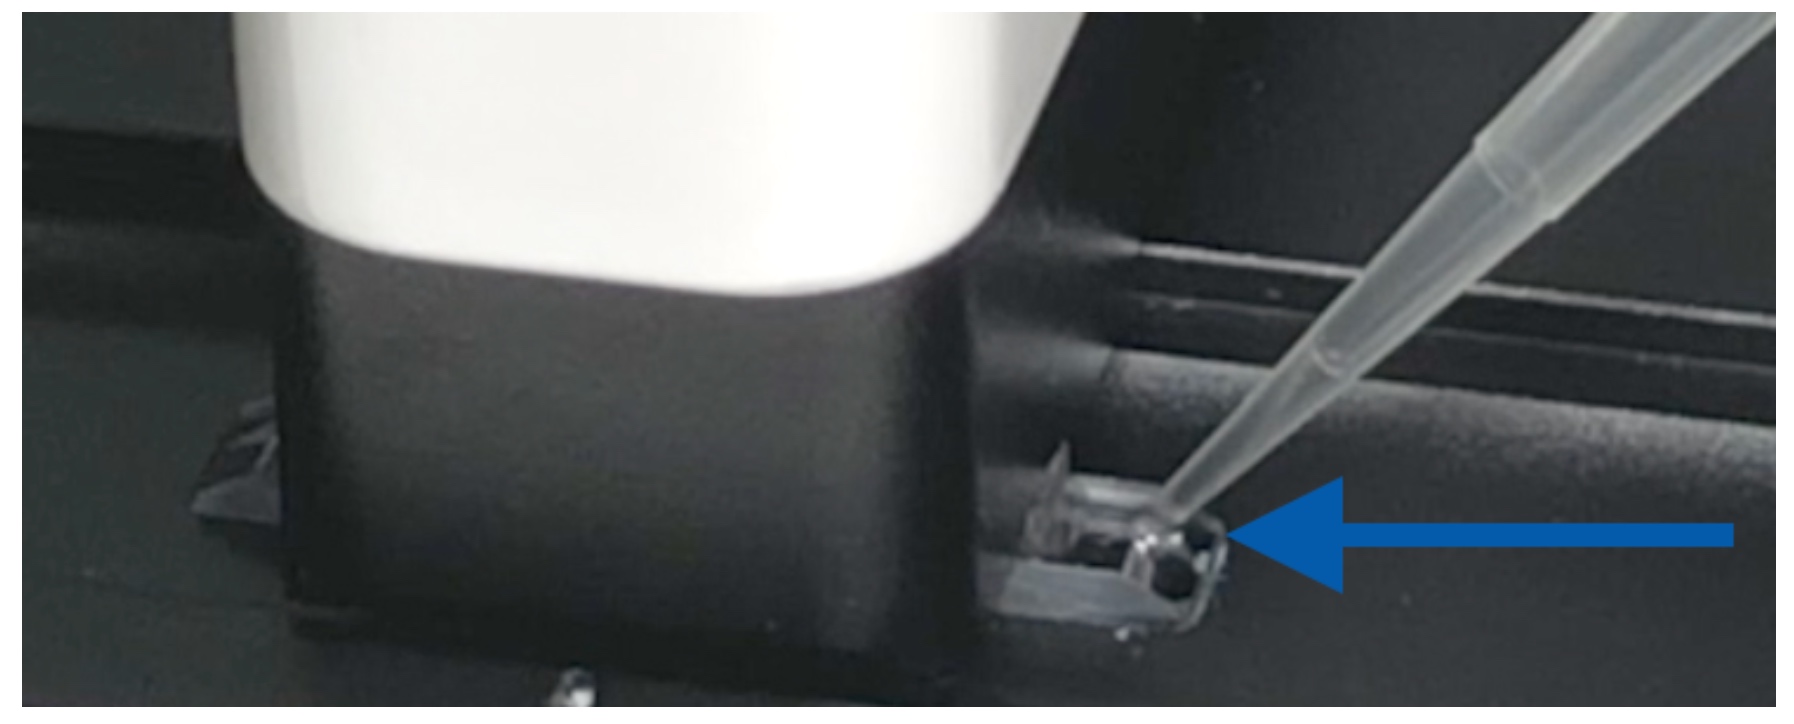
- Place the pipette tip in the alignment groove on the lower surface. Slide the tip against the upper sample surface and dispense the sample (Figure 1).
- Avoid drawing the sample back into the tip.
- Allow the cells to settle completely before adjusting focus and exposure or pressing the Count button.
- Note: This may take longer for smaller cells and/or larger chamber heights.
Focus
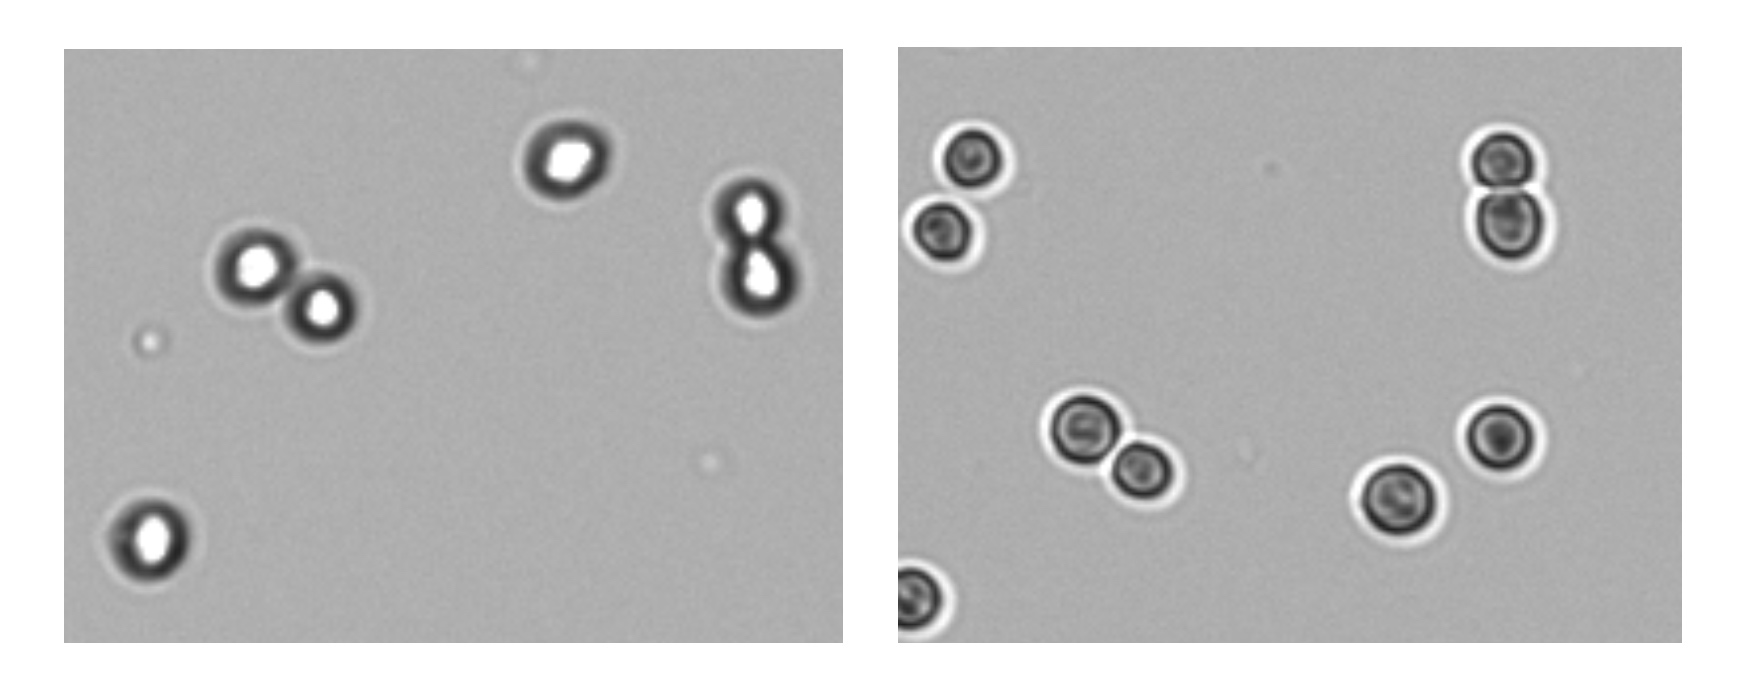
Correct focus is necessary for proper cell counts. For brightfield counting, adjust focus of live cells while viewing the brightfield channel. Touch the focus icon to open the focus control panel. With optimal focus, the membranes of live cells will appear as a dark ring around a bright white center (Figure 2).
Some fluorescence-capable count apps will have different focus optimization recommendations, refer to the info button within the focus control panel in each app for specific guidance. Additionally, Autofocus employs an algorithm that finds the best focal position for counting. After loading a sample and allowing cells to settle, focus manually by eye to ensure the cells are roughly in focus and then press the “Auto” button to begin.
Exposure
Trypan Blue and Erythrosin B App
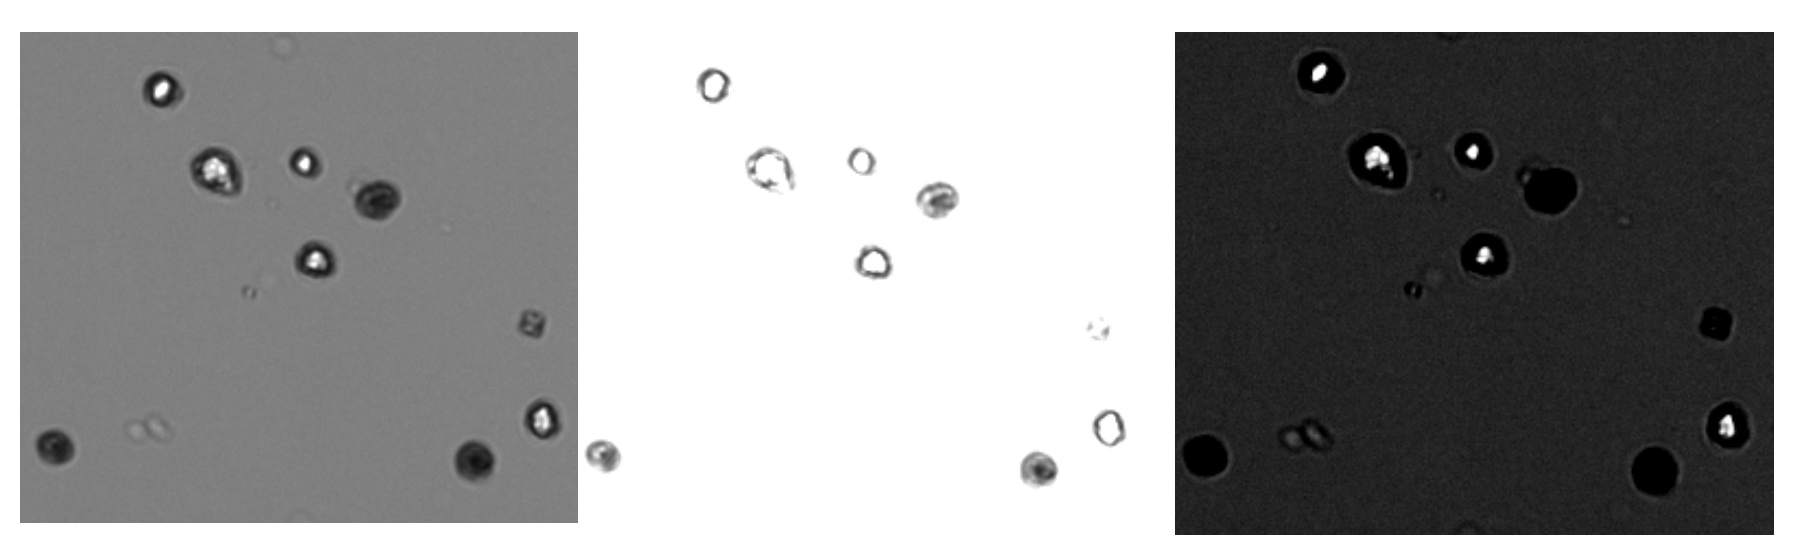
To count cells using any of these apps, first properly focus on the live cells in the sample, as shown in Figure 2.
Pressing the Exposure icon will show the settings that have already been calibrated to work with commonly used dye concentrations. Below these, the software also allows for custom exposures to be set in all of the brightfield viability apps.
For Trypan Blue Apps, use Normal exposure for a 1-to-1 solution of 0.4% trypan blue and cell suspension. Use Low exposure for a 1-to-1 solution of 0.2% trypan blue and cell suspension. For Erythrosin B apps there is a Standard exposure set for a 1-to-1 dilution of a 0.02% solution of Erythrosin B and cell suspension. For Custom exposures, touch the Custom exposure icon to begin setting a new exposure. Examples of proper and improperly exposed samples are shown in Figure 3.
Fluorescence Exposure
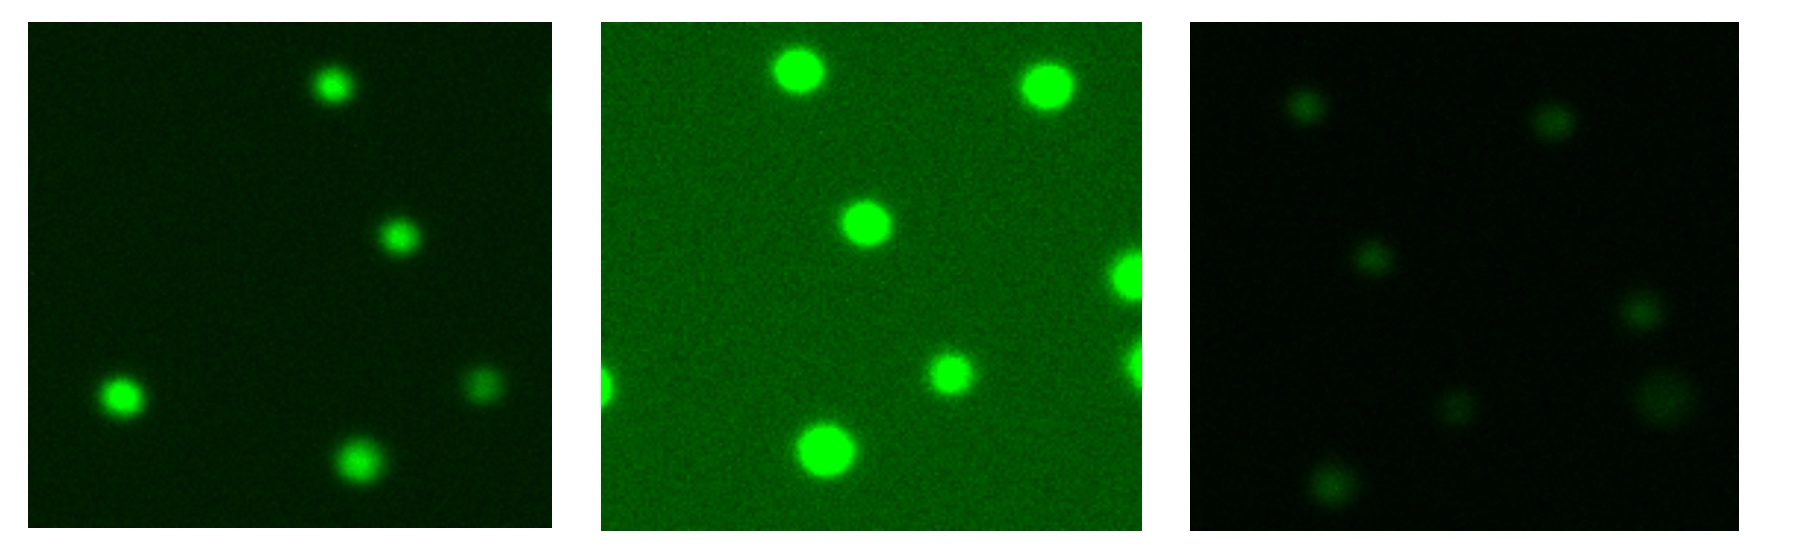
After setting proper focus in the brightfield channel, use the channel selector to choose the green or red fluorescence live preview. Touch the exposure icon to open the exposure control panel. Adjust the exposure so that the intensity is maximized without allowing the signal to exceed the cell boundary (Figure 4).
Switch between the brightfield and fluorescence channels during this process. The fluorescence signal should not appear larger in diameter than the boundaries of the cell when viewed in brightfield. For dual fluorescence applications, exposure in each channel should be set independently.
Count Settings, Protocols and Optimizing Results
The Default Protocol in each Count app includes count settings that are an appropriate starting point for counting most mammalian cells. Within any app, users may optimize settings for a result and save those settings in a user defined protocol.
While viewing a results, press the Optimize Settings button to display a list of parameters that can be edited. Technical Note 189 – CellDrop Count Settings includes detailed information about all count settings and how each impact the cell count. Press Count with Current Settings to reanalyze the image(s) using the new settings. Review the result and make additional changes as desired. Save the changes to a protocol using the “Save to Protocol” button. Use the Data app to review results and optimize settings of previous results.
Cleaning Sample Surfaces
CellDrop sample surfaces are constructed of optical grade sapphire and are highly resistant to lab chemicals and scratches. In normal operation, wiping with a dry laboratory wipe is sufficient for cleaning between counts.
If the cell suspension is not drawn into the sample chamber, clean the chamber surfaces and alignment grooves by flushing the chamber and groove with 70% ethanol as described below.
Improper loading technique, dried samples on the sample surfaces or routinely counting cell suspensions in media may require cleaning of CellDrop sample surfaces.
Procedure
- Load 15 µL of 70% ethanol into a pipette.
- Open the Brightfield app.
- Position the pipette in the alignment groove so that ethanol will flush out any debris in the groove (Figure 5).
- Dispense ethanol and wait 15 seconds.
- Raise arm.
- Firmly wipe both the upper and lower sample surfaces with a clean, dry laboratory wipe. For best results wipe two to three times in the same direction to prevent lint deposit.
View TechNote 190 for additional information on cleaning.
18-MAY-2026