Arm Contact and Screw
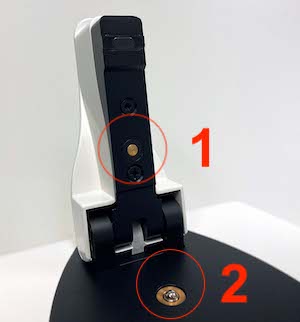
Normally when the arm is down, an electrical circuit is completed between the contact button (Figure 1 – ① ) in the arm and the head of the screw (Figure 1 – ② ). The instrument reliably detects this contact. However if there is contamination or an oxidized layer interfering with the two contact points, a “Lower Arm” alert may be present even when the arm is in the down position. Ethanol cleaning followed by a buffing/sanding of the components will remove the resistive layer. Follow both steps below.
Step 1. Ethanol Cleaning of Contact Points
- Spray a standard laboratory wipe with 70% ethanol. Do not pour or douse the instrument directly with the fluid.
- Lift the instrument arm.
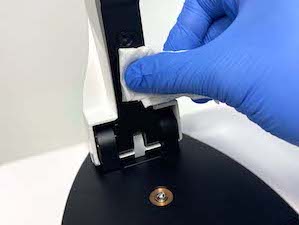
- Using the lab wipe, vigorously clean the contact button located on the bottom of the arm (Figure 2).
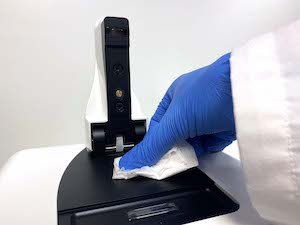
- Repeat this process and clean the top of the screw. (Figure 3).
Step 2. Sand / Scrape the Arm Contact Button and Screw
This step requires use of a material capable of sanding or abrading a surface. Use emery cloth, fine grit sandpaper or a similar material. Alternates that can remove a contaminant or oxidized layer include items such as the edge of a coin, X-ACTO knife blade, steel wool, etc.
- Lift the instrument arm.
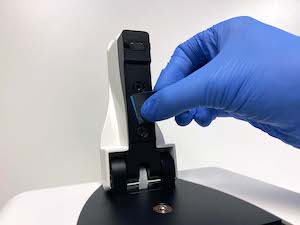
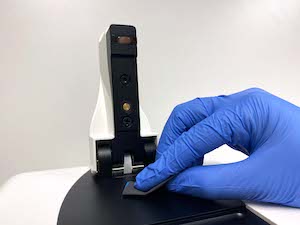
- Using the emery cloth, buff/sand the contact button located on the bottom of the arm (Figure 4).
- Repeat this process and buff / sand the top of the screw. (Figure 5).
- Spray a lab wipe with 70% ethanol.
- Use the wipe to clean the contact button and the arm screw to ensure all debris from the buffing operation has been removed.
- Lower arm to check if the contact is now correctly detected. Power cycling the instrument may be required.
- If the arm is down and an alert is still present, contact DeNovix or your local Distributor for further assistance.
Revised 03 Sept 2021


